Transplanting Seedlings
Learn how to successfully move your seedlings from indoors to the garden. Master hardening off, timing, and techniques to prevent transplant shock.
Why Proper Transplanting Matters
Transplanting is one of the most critical moments in a plant's life. Moving from the protected indoor environment to the outdoor garden subjects seedlings to wind, direct sun, temperature fluctuations, and pests they've never encountered.
Done correctly, transplanting gives your plants a strong start. Done poorly, it can set plants back weeks or even kill them. The key is preparation—both for the plant and the garden bed.
Hardening Off: The Essential First Step
Hardening off is the process of gradually acclimating indoor seedlings to outdoor conditions. This strengthens cell walls, thickens cuticles, and prepares plants for life outside. Never skip this step!
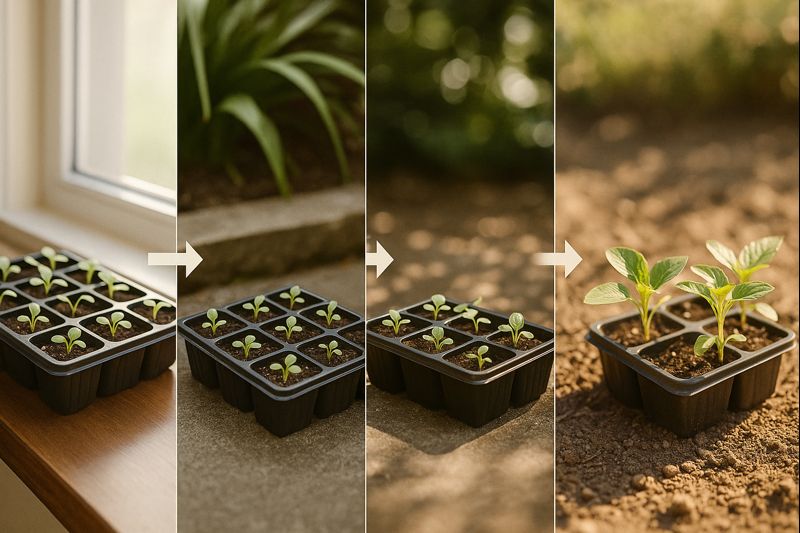
Gradually increase sun exposure over 7-10 days to prevent transplant shock
Place seedlings outdoors in a shaded, protected spot for 1-2 hours. Bring inside.
Increase outdoor time to 3-4 hours. Introduce some filtered sunlight.
Leave outside for 5-6 hours with increasing sun exposure. Begin leaving out during mild nights.
Full sun exposure for most of the day. Leave out overnight if temps stay above 50°F.
Seedlings can stay outside full-time. They're ready for transplanting.
Ideal Transplanting Conditions
Weather
Overcast days are ideal. If sunny, transplant in late afternoon to give plants overnight to recover before facing full sun.
Temperature
Soil should be at least 50°F for cool crops, 60°F+ for warm crops. Air temps between 60-75°F are ideal for transplanting.
Soil Moisture
Garden soil should be moist but not waterlogged. If too dry, water the day before. If too wet, wait for it to drain.
Timing
Check your last frost date. Cold-hardy crops can go out 2-4 weeks before. Tender crops should wait until 1-2 weeks after.
Step-by-Step Transplanting Guide
Timing is crucial for transplant success.
- Transplant on a cloudy day or in late afternoon
- Avoid transplanting during heat waves
- Wait until after your last frost date for tender crops
- Soil temperature should be appropriate for the crop
- Check the 10-day forecast - avoid transplanting before storms
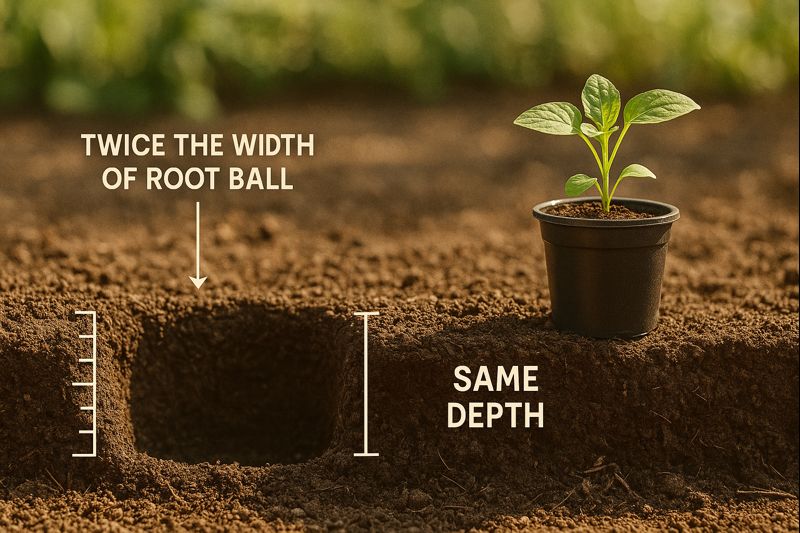
Give your transplants a great start with proper hole preparation.
- Dig hole twice as wide as the root ball
- Depth should match the seedling's current soil level
- Amend with compost if soil is poor
- Add a handful of worm castings for nutrition
- Water the hole before placing the plant
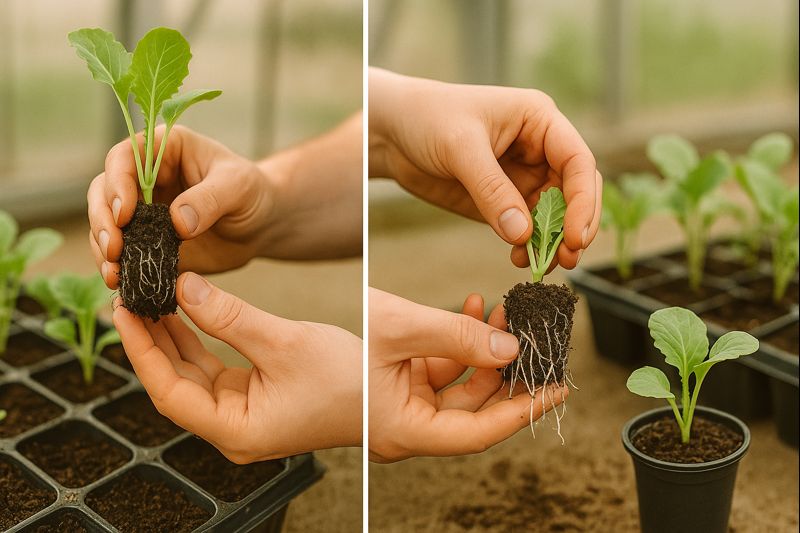
Handle seedlings gently to minimize root disturbance.
- Water seedlings an hour before transplanting
- Squeeze cell pack to loosen root ball
- Hold by leaves, never by stem
- Place at same depth (tomatoes can go deeper)
- Fill around roots and firm gently
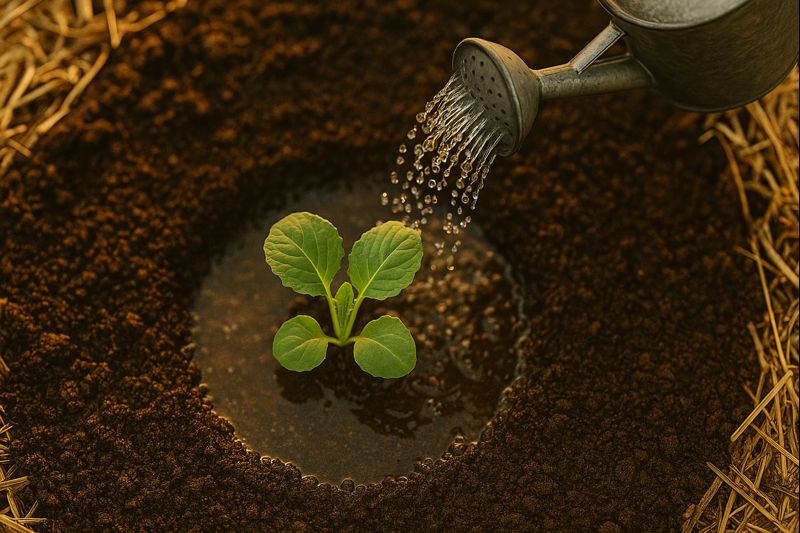
Initial care is critical for establishment.
- Water deeply immediately after planting
- Create a small basin to hold water
- Add mulch around (not touching) stems
- Provide shade cloth for first few days if sunny
- Use cutworm collars on susceptible crops
Monitor closely for the first week.
- Check daily for wilting - water as needed
- Watch for pest damage on tender new growth
- Don't fertilize for at least a week
- Remove any flowers on newly transplanted seedlings
- Stake or cage plants that will need support
Crop-Specific Tips
Can be planted deeper - bury up to first set of true leaves. Roots will form along buried stem.
Wait until soil is warm (65°F+). Cold soil stunts growth permanently.
Can handle light frost after hardening. Plant slightly deeper than they grew in pots.
Very sensitive to root disturbance. Handle carefully or start in peat pots.
Tolerates crowding. Can transplant small seedlings very close together.