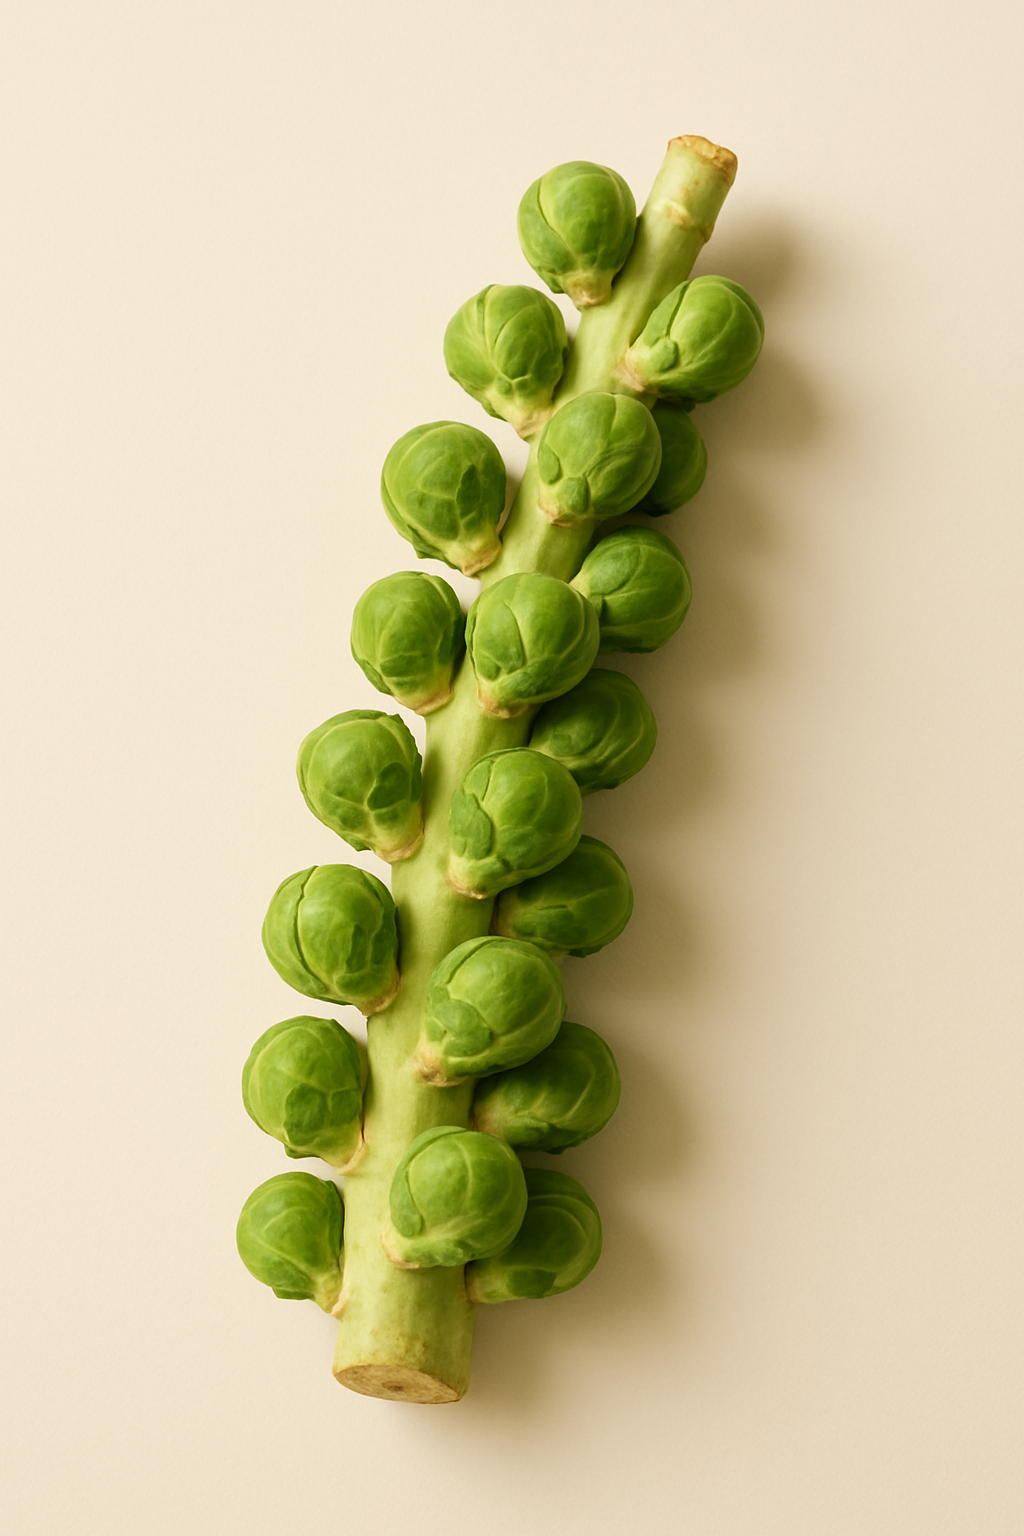
Brussels Sprouts
Brassica oleracea var. gemmifera
Family: Brassicaceae
Brussels sprouts are mini cabbages that grow along a tall stalk. They require a long, cool growing season but reward patience with sweet, nutty sprouts that taste best after frost. Once maligned, properly grown Brussels sprouts have become a culinary star.
Days to Harvest
80-130 days
Sun Needs
Full Sun (6+ hours)
high
Germination Temp
70°F optimal
Start Indoors
6 weeks before last frost
Germination
4-10 days
Seed Depth
1/2 inch
Light to Germinate
No
💡 Tip: Start indoors in late spring for fall harvest. Count backwards from first fall frost to determine start date.
Soil Type
Rich, well-draining soil with organic matter
pH Range
6 - 7.5
Spacing
24-30 inches between plants, 30-36 inches between rows
⚠️ Avoid planting near:
History
Brussels sprouts emerged in Belgium sometime during the 13th to 16th centuries, with the first written references appearing in 1587 from the southern Netherlands region. The city of Brussels, which gave the vegetable its name, is located in this region where the cool, damp climate proved ideal for cultivation. From Belgium, Brussels sprouts spread across northern Europe—to France, the Netherlands, Germany, and eventually Britain, where they became a Christmas dinner tradition by the Victorian era. The vegetable reached America in the 18th century but remained unpopular until very recently, largely due to the common practice of boiling them into sulfurous mush. The rehabilitation of Brussels sprouts began in the early 2000s when restaurant chefs discovered that high-heat roasting and pan-frying caramelizes their natural sugars, transforming them from dreaded childhood punishment into craveable side dish. Food scientists also contributed by breeding varieties with lower glucosinolates—the compounds responsible for bitter flavors and pungent cooking odors. A 2011 Dutch study confirmed what growers suspected: modern varieties bred since the 1990s are genuinely milder than their predecessors. The vegetable's other secret is frost—cold temperatures convert starches to sugars, making post-frost sprouts noticeably sweeter. This is why commercial production concentrates in cool coastal regions like California's Central Coast and the Brussels area itself. Once among the most hated vegetables in America, Brussels sprouts have become a menu darling, appearing in everything from hip gastropubs to fine dining establishments, typically roasted with bacon, balsamic, or other bold accompaniments.
Nutritional Benefits
- ✓Very high in Vitamin K
- ✓Excellent source of Vitamin C
- ✓High in fiber
Optimal Growing Temp
60°F - 65°F
Brussels sprouts require a long, cool growing season with temperatures between 60-65°F for sprout formation. Plants tolerate heat during vegetative growth but need cool weather (below 70°F) when sprouts are developing. Frost actually improves flavor by converting starches to sugars.
Survival Range
20°F - 75°F
Can survive these temperatures
Frost Note: Brussels sprouts are extremely cold-hardy, tolerating temperatures down to 20°F once established. Light frosts dramatically improve sweetness—harvest after several frosts for best flavor. Mature plants can survive hard freezes, making them an excellent late-season crop.
Best USDA Zones
Humidity
50-70%
Moderate humidity is ideal. High humidity increases risk of fungal diseases and aphid infestations between the tight sprouts. Good air circulation around plants is important.
Height
24-36 inches
Spread
18-24 inches
Growth Habit
upright
Germination
4-10 days
Seeds germinate readily at 45-85°F, with optimal germination at 70°F. Cotyledons emerge first, followed by true leaves showing characteristic brassica shape.
Seedling Stage
Duration: 4-6 weeks
True leaves: First true leaves appear 7-10 days after sprouting with the typical lobed brassica leaf shape
Transplant ready: Ready to transplant when 4-6 inches tall with 4-5 true leaves. Harden off for 7-10 days before transplanting outdoors.
Vegetative Growth
Duration: 8-12 weeks after transplant
Long vegetative phase building the tall central stalk and large leaf canopy. Plants grow steadily, producing leaves that will later shelter developing sprouts in their axils.
Flowering
Timing: Sprouts form in leaf axils, not true flowers until second year
Duration: Sprout formation occurs over 6-10 weeks as temperatures cool
The edible sprouts are vegetative buds, not flowers. Plants bolt and flower in the second year if overwintered.
Harvest Maturity
Timing: 80-130 days from transplant depending on variety
- Sprouts are 1-2 inches in diameter
- Sprouts are firm and tight when squeezed
- Lower sprouts mature first, harvest from bottom up
- Best flavor develops after exposure to frost
- Outer leaves begin yellowing on mature plants
Per Plant
1-2 lbs of sprouts per plant (50-100 sprouts)
Per Square Foot
0.5-1 lb per square foot
Harvest Frequency
Harvest gradually from bottom to top over 6-8 weeks, or harvest entire stalk at once
Factors Affecting Yield
- •Cool temperatures during sprout formation are critical for tight, sweet sprouts
- •Frost exposure converts starches to sugars, dramatically improving flavor
- •Consistent moisture prevents loose, bitter sprouts
- •Adequate nitrogen during vegetative growth supports robust stalk development
- •Topping (removing growing tip) in early fall encourages uniform sprout sizing
- •Variety selection affects both timing and sprout size
Seedling Stage
Keep consistently moist but not waterlogged—water daily in warm weather
Established Plants
1-2 inches per week, deep watering every 3-4 days
During Fruiting
Maintain consistent moisture during sprout formation—stress causes loose sprouts
Preferred Method
Drip irrigation or soaker hoses work best. Water at soil level to avoid wetting foliage. Deep, infrequent watering encourages deep root growth.
⚠️ Critical Watering Periods
- • Sprout formation
- • Hot weather during vegetative growth
Pro Tips
- Mulch heavily (3-4 inches) to retain consistent soil moisture
- Water stress during sprout formation causes loose, bitter sprouts
- Morning watering reduces disease risk
- Deep watering encourages deeper, more stable roots
Feeding Schedule
At Transplanting
Balanced fertilizer with added compost
Once at planting
Early Vegetative Growth
High nitrogen (10-5-5 or blood meal)
Every 2-3 weeks
Mid-Season
Balanced fertilizer (10-10-10)
Every 3-4 weeks
Sprout Formation
Balanced with extra calcium
Every 3 weeks
Organic Options
Side-dress with compost or aged manure every 3-4 weeks. Apply fish emulsion or blood meal for nitrogen boost during vegetative growth. Add bone meal at planting for phosphorus and calcium.
Minimum Size
7 gallon minimum
Recommended Size
15-20 gallon for full-sized plants
Depth Required
At least 18 inches deep for stability—tall plants get top-heavy
Best Varieties for Containers
Container Tips
- Container growing is challenging due to Brussels sprouts' long season and height
- Use premium potting mix with added compost for fertility
- Stake plants early as they become top-heavy with sprouts
- Feed every 2-3 weeks with balanced liquid fertilizer
- Position where plants receive full sun but with protection from drying winds
- Water deeply and consistently—containers dry out faster than garden beds
Why Prune
When
Remove lower leaves as they yellow throughout the season. Top plants 3-4 weeks before desired harvest.
How Often
Remove yellowed leaves as needed. Topping is done once per season.
Technique
Topping: remove the growing point (top 1-2 inches of the main stem) in early fall. This stops upward growth and redirects energy into sizing up existing sprouts.
Remove
- ✗ Yellowed or diseased lower leaves
- ✗ Growing tip when topping
- ✗ Any damaged leaves
Keep
- ✓ Healthy green upper leaves—they photosynthesize to feed sprout development
- ✓ All developing sprouts
- ✓ Enough leaves for plant health